To help potential users test out Tungsten Fabric quickly, the community recommends installing tf-devstack on a. This post outlines how to do that.
As a part of my first Google Summer of Code (GSOC) experience, tf-devstack has been a great walkthrough of how to deploy Tungsten Fabric from published containers or building directly from the source using instances spawned in AWS, Openstack, or your local laptop. Find the latest instance of tf-devstack in the Tungsten Fabric repository.
In this walk through, I will be showing how to setup tf-devstack referring to the link above on whatever system you chose. The most exciting thing about the tf-devstack is that this tool brings up Tungsten Fabric along with Kubernetes on a single node deployment. With this Kubernetes deployment, Tungsten Fabric offers many capabilities, such as pod addressing, network isolation, gateway services, load balancing in services, etc.
Recommendations for Hardware/Software requirements:
- CentOS 7 (x86_64) – with Updates HVM
- xlarge instance type
- 50 GiB disk Storage
Quick start on an AWS instance:
- Create an instance using the specifications in the previous section. This walkthrough uses AWS.
- SSH into the instance launched using the public IP address.
ssh centos@<public_instance_ipaddress>
- Get root access
sudo su
- In case of centos, yum may be used to install git to clone the repository –
yum install -y git
- Clone the repository and start the contrail networking deployment process–
git clone https://github.com/tungstenfabric/tf-devstack
cd tf-devstack
export K8S_VERSION=1.12.7
./startup.sh
This script allows the root user to connect to a host via ssh, install and configure docker, build contrail-dev-control container and helps the user start the contrail networking deployment process.
Known errors –
- Permission denied or unable to establish connection –It is important to map the private IP address with the public IP address in order to gain access to the UI for the contrail deployed on the instance. Thus, the user should not forget to add the inbound security rule for a custom TCP connection on port 8143 since the contrail works on port 8143.
- Occasional errors prevent deployment of Kubernetes on a VirtualBox machine; retry can help. Also, keep in mind this is not idempotent, hence there might be broken connections which the user might not be able to figure out. Hence, spawning a new instance may be recommended.
Getting Access to the Tungsten Fabric UI –
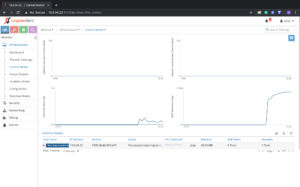
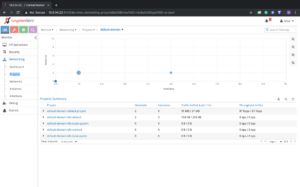
After being successfully able to run the scripts above to get started you may be prompted with the username and id with the service deployed on the public IP address with the help of which you may be able to log into the Tungsten Fabric UI.


Creating Workloads in Kubernetes –
Users must keep in mind that Kubernetes sometimes prevents from pushing pods/workloads to the control nodes. Also, having a single node working, the user needs to remove the taint while working with the following command hence removing the taint from the host.
kubectl taint nodes NODENAME node-role.kubernetes.io/master-, where NODENAME is name from “kubectl get node”
It’s time to relax and start your service now with Kubernetes!
- Create a basic test.yaml
Follow the link https://github.com/kubernetes/examples to learn on how to create a sample test.yaml for your first service deployment. Here is one example that I am using from the link below –https://github.com/paulbouwer/hello-kubernetes
Refer to the wiki pages for kubernetes for basic references on how it works.
- use Kubectl to upgrade/operate the cluster and deploy the objects.
This service may also be used to deploy your first Hello World service. kubectl apply -f test.yaml

- Check the status of your pods using:
kubectl get pods

Congratulations, you are now a master of Kubernetes who has deployed the service simple using the tf-devstack. Never thought it would be this easy :p
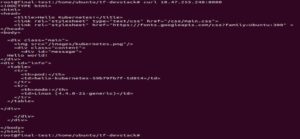
At last, the user may be able to check the endpoints of their service and test it out.


In order to reach your end points, try using the curl command as per the screenshot above and see your application deployed now.
Lastly, to be able to enable logs enable the dstat service and check the performance for your system. Tcpdump may be used as well.
I hope you enjoyed reading about and the implementation of your very own network containerized environment using tf-devstack.
ABOUT THE AUTHOR
Nishita Sikka is a graduate student at Northeastern University, pursuing an MS in computer system networking and telecommunications. Her Google Summer Of Code experience with Tungsten Fabrics has allowed her explore more on cloud technologies, automation tools, and networking. She worked with Ansible and Kubernetes aid is making her way with Python and learning to integrate networking with automation. Besides being super passionate about working on independent projects and practicing code, she enjoys sports and Crossfit.
